nginx spdy patch for 1.14.0 1.13.12

spdy 协议由于安卓碎片化的存在 暂时还是需要保留一段时间的兼容性

准备升级到nginx1.14的时候发现 work process 会自动 退出, 同时系统日志有 nginx segfault的信息

修改配置,抓取coredump信息,需要做以下内容
nginx 增加

worker_rlimit_core 5000M;
working_directory /path/to/cores/;
$> ulimit -c unlimited
$> mkdir /opt/coredump/ && chown nobody.nobody /opt/coredump/ # 先建目录,还要确认nginx用户可以写此目录
$> echo “/opt/coredump/core-%e-%p-%h-%t” > /proc/sys/kernel/core_pattern

拿到coredump文件后使用gdb分析

gdb /path/to/nginx /path/to/cores/nginx.core
backtrace full

发现问题指向了
src/http/ngx_http_spdy.c:ngx_http_spdy_state_read_data 的
buf->last = ngx_cpymem(buf->last, pos, size);

简单调试发现buf->last是个0, ngx_cpymem会因为内存越界导致coredump

而分析代码 + gdb 断点调试 看到初始化r->request_body->buf的部分: ngx_http_spdy_init_request_body(r) 并未执行

打印r->request_body 内容发现这块被初始化了,对比nginx1.12.2和1.10.3版本发现旧版本则是未做初始化

翻了下调用的部分:ngx_http_request_body: ngx_http_read_client_request_body 可以看到在nginx 1.13.12版本开始会对r->request_body 做了初始化操作,这部分直接导致了SPDY 补丁 的不兼容

所以答案就很简单了,修改下判断条件即可

新补丁放在了:https://github.com/favortel/nginx_patch/blob/master/nginx-1.14.0_spdy_h2.patch
参考文档:
https://toontong.github.io/blog/nginx-gdb-coredump-segfault.html
https://www.nginx.com/resources/wiki/start/topics/tutorials/debugging/
http://lxr.nginx.org/source/src/http/ngx_http_request_body.c
http://lxr.nginx.org/source/src/http/ngx_http_request_body.c?v=nginx-1.12.2

postfix 内网发信

一般来说我们的linux服务器有内网发信的权限就可以了,所以需要对postfix进行简单的配置
修改 vim /etc/postfix/main.cf

myhostname = lookgod.sohu.com
mynetworks = 127.0.0.0/8
relayhost = transport_server_ip

顺便修改下 inet_protocols = ipv4 以免ipv6报错

就可以了

nginx add_header的一个陷阱

Syntax: add_header name value [always];
Default:
Context: httpserverlocationif in location

Adds the specified field to a response header provided that the response code equals 200, 201 (1.3.10), 204, 206, 301, 302, 303, 304, 307 (1.1.16, 1.0.13), or 308 (1.13.0). The value can contain variables.

There could be several add_header directives. These directives are inherited from the previous level if and only if there are no add_header directives defined on the current level.

add_header指令可以从上一级继承  当且仅当 当前级别没有add_header指令

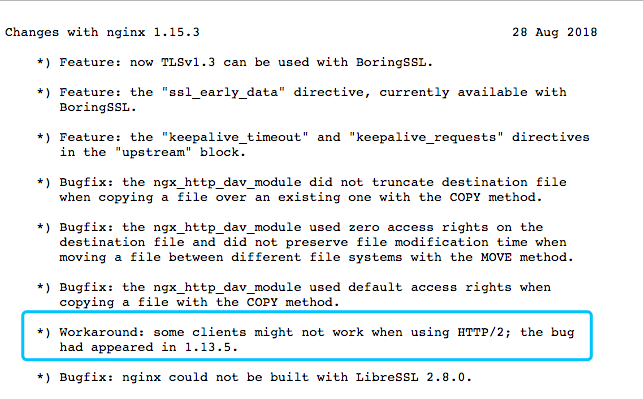
If the always parameter is specified (1.7.5), the header field will be added regardless of the response code.


在全局配置加了个需要使用的header, 现在假如在某个location 或者 server 也需要add_header,则会覆盖掉全局配置的

http {… add_header http-global ‘123’;…}

server {… add_header server-conf ‘321’;…}

则 这个server 是看不到 http-global: 123  这个header的,需要注意


其实,proxy_set_header 也是完全相同的情况

Syntax: proxy_set_header field value;
Default:
proxy_set_header Host $proxy_host;
proxy_set_header Connection close;
Context: httpserverlocation

Allows redefining or appending fields to the request header passed to the proxied server. The value can contain text, variables, and their combinations. These directives are inherited from the previous level if and only if there are no proxy_set_header directives defined on the current level. By default, only two fields are redefined:


ssh 的一些小技巧

1. 通常批量处理的时候会遇到ip down的问题,会等待非常久,可以加个超时
ssh -o ConnectTimeout=3

2. 如果要在远端机器使用变量怎么办? 因为变量会在本地机器被默认解析, 比如awk的$1, 所以可以加个反斜杠\
ssh -o ConnectTimeout=3 $IP " cat filelist |awk '{print \$1}' "

3. 如果要把远端运行结果赋值给某个变量怎么办?,因为执行的命令也会在本地机器被默认解析,所以也需要加个反斜杠\
ssh $IP “df_data= \`df\`; echo \$df_data ”

4. 另外,如果是逐个IP批处理,很容易遇到执行一个就退出的情况,需要加个n
ssh -n $IP

ciphers suite的选择

HTTPS ciphers suite 的选择要奉行一个原则: 安全 兼容 性能

可以参考https://wiki.mozilla.org/Security/Server_Side_TLS#Recommended_configurations 这个链接

Configuration Oldest compatible client
Modern Firefox 27, Chrome 30, IE 11 on Windows 7, Edge, Opera 17, Safari 9, Android 5.0, Java 8
Intermediate Firefox 1, Chrome 1, IE 7, Opera 5, Safari 1, Windows XP IE8, Android 2.3, Java 7
Old Windows XP IE6, Java 6

如果是个人网站,不需要考虑支持较老和古老的浏览器,直接选择Modern支持即可

对于大多数的网站来说,还是需要综合考量的,先假设只需要支持modern和Intermediate

Intermediate compatibility (default)

For services that don’t need compatibility with legacy clients (mostly WinXP), but still need to support a wide range of clients, this configuration is recommended. It is is compatible with Firefox 1, Chrome 1, IE 7, Opera 5 and Safari 1.

  • Ciphersuites: ECDHE-ECDSA-CHACHA20-POLY1305:ECDHE-RSA-CHACHA20-POLY1305:ECDHE-ECDSA-AES128-GCM-SHA256:ECDHE-RSA-AES128-GCM-SHA256:ECDHE-ECDSA-AES256-GCM-SHA384:ECDHE-RSA-AES256-GCM-SHA384:DHE-RSA-AES128-GCM-SHA256:DHE-RSA-AES256-GCM-SHA384:ECDHE-ECDSA-AES128-SHA256:ECDHE-RSA-AES128-SHA256:ECDHE-ECDSA-AES128-SHA:ECDHE-RSA-AES256-SHA384:ECDHE-RSA-AES128-SHA:ECDHE-ECDSA-AES256-SHA384:ECDHE-ECDSA-AES256-SHA:ECDHE-RSA-AES256-SHA:DHE-RSA-AES128-SHA256:DHE-RSA-AES128-SHA:DHE-RSA-AES256-SHA256:DHE-RSA-AES256-SHA:ECDHE-ECDSA-DES-CBC3-SHA:ECDHE-RSA-DES-CBC3-SHA:EDH-RSA-DES-CBC3-SHA:AES128-GCM-SHA256:AES256-GCM-SHA384:AES128-SHA256:AES256-SHA256:AES128-SHA:AES256-SHA:DES-CBC3-SHA:!DSS
  • Versions: TLSv1.2, TLSv1.1, TLSv1
  • TLS curves: prime256v1, secp384r1, secp521r1
  • Certificate type: RSA
  • Certificate curve: ‘None
  • Certificate signature: sha256WithRSAEncryption
  • RSA key size: 2048
  • DH Parameter size: 2048
  • ECDH Parameter size: 256
  • HSTS: max-age=15768000
  • Certificate switching: None

几个关键点:

  1.  RSA key 用2048的签名就可以了
  2.  DH 用2048
  3.  使用TLS1.0-1.2, 不要使用不安全的SSLv2-3
  4.  加密的cipher-suite 可以参考以上,也可以自己调整顺序,比如可以根据自己客户端是PC浏览器多还是移动端多,把CHACHA挪后…


参考资料:
https://wiki.mozilla.org/Security/Server_Side_TLS#Recommended_configurations

spdy 和 http2.0 支持

虽然spdy 协议早已被 HTTP2 取代,但是chrome 旧浏览器和 移动端基于chrome内核的应用还是挺多的,所以spdy 的兼容还是必要的

cloudflare 出了个spdy的补丁,可以兼容HTTP2和SPDY

https://blog.cloudflare.com/open-sourcing-our-nginx-http-2-spdy-code/

靠谱补丁 for nginx 1.10.3:
https://github.com/cujanovic/nginx-http2-spdy-patch/blob/master/nginx-spdy.patch
一般靠谱补丁:
https://github.com/cloudflare/sslconfig/tree/master/patches

打完补丁后, build的时候增加编译参数即可

–with-http_spdy_module #开启spdy 协议, 需要打上cloudflare的patch
–with-http_v2_module #开启HTTP2 协议,不需要任何补丁

nginx 相关配置可以参考nginx 配置文档
server {
listen 443 spdy http2;

}

nginx https 入门配置

nginx 版本选择,一般1.10 或者当前最新stable的1.12都没什么问题

编译参数:

--prefix=/opt/itc/nginx --with-http_ssl_module --with-http_v2_module --with-openssl=../openssl-1.1.0f --with-pcre=../pcre-8.38 --with-zlib=../zlib-1.2.11

其中:
openssl 可以选用1.0版本也可以选用1.1版本,性能会更强,可以在openssl.org下载
pcre zlib都需要自行在对方官网下载
另外, 这两个参数可以按需使用:


--with-openssl-opt=enable-weak-ssl-ciphers #openssl1.1版本开启weak_cipers
--with-http_spdy_module #开启spdy 协议,需要打上cloudflare的patch

配置:

server {
listen 443 spdy http2;
server_name www.4os.org;
root /opt/www/www.4os.org;
access_log logs/www.log main;

ssl_certificate ssl/your_site_key.crt; #公钥
ssl_certificate_key ssl/your_site_key.key; #私钥

ssl_dhparam ssl/dhparams.pem;
ssl_ciphers “ECDHE-ECDSA-AES128-GCM-SHA256:ECDHE-RSA-AES128-GCM-SHA256:ECDHE-RSA-AES256-GCM-SHA384:ECDHE-ECDSA-AES256-GCM-SHA384:DHE-RSA-AES128-GCM-SHA256:DHE-DSS-AES128-GCM-SHA256:kEDH+AESGCM:ECDHE-RSA-AES128-SHA256:ECDHE-ECDSA-AES128-SHA256:ECDHE-RSA-AES128-SHA:ECDHE-ECDSA-AES128-SHA:ECDHE-RSA-AES256-SHA384:ECDHE-ECDSA-AES256-SHA384:ECDHE-RSA-AES256-SHA:ECDHE-ECDSA-AES256-SHA:DHE-RSA-AES128-SHA256:DHE-RSA-AES128-SHA:DHE-DSS-AES128-SHA256:DHE-RSA-AES256-SHA256:DHE-DSS-AES256-SHA:DHE-RSA-AES256-SHA:ECDHE-RSA-DES-CBC3-SHA:ECDHE-ECDSA-DES-CBC3-SHA:AES128-GCM-SHA256:AES256-GCM-SHA384:AES128-SHA256:AES256-SHA256:AES128-SHA:AES256-SHA:AES:CAMELLIA:DES-CBC3-SHA:!aNULL:!eNULL:!EXPORT:!RC4:!MD5:!PSK:!aECDH:!DHE”;
ssl_prefer_server_ciphers on;
#ssl_ecdh_curve secp384r1;
ssl_protocols TLSv1 TLSv1.1 TLSv1.2;

location / {

}
}

cipher_suite 的选择可以参考: https://wiki.mozilla.org/Security/Server_Side_TLS#Recommended_configurations

https 支持 IE6和 winXP

winXP + IE6 是非常非常古老的组合, 如果确实需要支持会稍微麻烦些
1. winXP 必须是更新到SP3的,之前的版本无法支持sha2 证书
2. 需要支持TLS_RSA_WITH_3DES_EDE_CBC_SHA 这个属于weak的cipher suite,如果编译的是openssl1.1 版本,则需要编译的时候加入 –with-openssl-opt=enable-weak-ssl-ciphers 参数以开启
3. SNI 不支持,因此IE6只会接收默认的证书,需要把需要支持的域名打到默认证书里边,并且首先加载这个默认虚机 (从测试看,谁先加载谁就是默认证书)
4. 需要开启SSLv3,这是非常不建议的操作
默认的IE6用户设置是没有勾选IE设置里边的TLS1.0的,只支持SSLv2 和 SSLv3

sed 高级模式

n 模式: 读取下一行到pattern space,并只处理下一行
N 模式: 将下一行添加到pattern space中,把当前行和下一行一起处理

举个例子
默认情况,读入一行显示/处理一行


$ cat test 
a
b
c
d
$ sed '=;p' test 
1
a
a
2
b
b
3
c
c
4
d
d

n模式,读入2行,显示/处理第二行


$ sed '=;n;p' test 
1
a
b
b
3
c
d
d

N模式,读入2行,显示/处理2行


$ sed '=;N;p' test 
1
a
b
a
b
3
c
d
c
d

那么,N模式有什么用? 这就有了著名的sed删除换行符的梗

sed ':a;N;$!ba;s/\n/ /g' file

:a 是定义了个label
N 则是上文的N模式了,一次读入2行,处理2行

Explanation:

1.Create a label via :a.
2.Append the current and next line to the pattern space via N.
3.If we are before the last line, branch to the created label $!ba ($! means not to do it on the last line as there should be one final newline).
4.Finally the substitution replaces every newline with a space on the pattern space (which is the whole file).

rp_filter 在rhel6 和 rhel7 之后的一些改变

rp_filter, reverse-path filtering,反向过滤技术,系统在接收到一个IP包后,检查该IP是不是合乎要求,不合要求的IP包会被系统丢弃。该技术就称为rp filter。怎么样的包才算不合要求呢?例如,用户在A网口上收到一个IP包,检查其IP为B。然后考查:对于B这个IP,在发送时应该用哪个网口,“如果在不应该接收到该包的网口上接收到该IP包,则认为该IP包是hacker行为”。

例如:

A: 192.168.8.100

B: (IGMP Query) 10.0.0.1 来自路由器

查找路由表

网卡1为默认路由: 172.17.5.100 172.17.5.1

网卡2 192.168.8.100 192.168.8.1

系统根据路由表,认为10.0.0.1这个IP应该在第一个网卡172.17.5.100上收到,现实的情况是在第二张网卡192.168.8.100上收到了。认为这是不合理的,丢弃该包。致命的问题的,该包是来自路由器的IGMP Query包。

The rp_filter can reject incoming packets if their source address doesn’t match the network interface that they’re arriving on, which helps to prevent IP spoofing. Turning this on, however, has its consequences: If your host has several IP addresses on different interfaces, or if your single interface has multiple IP addresses on it, you’ll find that your kernel may end up rejecting valid traffic. It’s also important to note that even if you do not enable the rp_filter, protection against broadcast spoofing is always on. Also, the protection it provides is only against spoofed internal addresses; external addresses can still be spoofed.. By default, it is disabled.

rp_filter参数在升级到RHEL6之后的版本后出现了比较大的改变,我们看下内核参数解析

在RHEL5的时候这个内核参数的含义:


/usr/share/doc/kernel-doc-2.6.18/Documentation/networking/ip-sysctl.txt

rp_filter - BOOLEAN
        1 - do source validation by reversed path, as specified in RFC1812
            Recommended option for single homed hosts and stub network
            routers. Could cause troubles for complicated (not loop free)
            networks running a slow unreliable protocol (sort of RIP),
            or using static routes.

        0 - No source validation.

        conf/all/rp_filter must also be set to TRUE to do source validation
        on the interface

        Default value is 0. Note that some distributions enable it
        in startup scripts.

在RHEL6 RHEL7之后这个内核参数的含义:


/usr/share/doc/kernel-doc-2.6.32/Documentation/networking/ip-sysctl.txt

rp_filter - INTEGER
        0 - No source validation.
        1 - Strict mode as defined in RFC3704 Strict Reverse Path 
            Each incoming packet is tested against the FIB and if the interface
            is not the best reverse path the packet check will fail.
            By default failed packets are discarded.
        2 - Loose mode as defined in RFC3704 Loose Reverse Path 
            Each incoming packet's source address is also tested against the FIB
            and if the source address is not reachable via any interface
            the packet check will fail.

        Current recommended practice in RFC3704 is to enable strict mode 
        to prevent IP spoofing from DDos attacks. If using asymmetric routing
        or other complicated routing, then loose mode is recommended.

        The max value from conf/{all,interface}/rp_filter is used 
        when doing source validation on the {interface}.

        Default value is 0. Note that some distributions enable it
        in startup scripts.

所以如果需要和RHEL5的行为保持一致,应该设置


net.ipv4.conf.default.rp_filter = 2
net.ipv4.conf.all.rp_filter = 2

否则在多IP/多网卡/多网段的时候,会出现非预期的丢弃数据包的问题
具体可以参考:
redhat 官方文档: https://access.redhat.com/solutions/53031
案例分析: http://www.cnblogs.com/huazi/archive/2013/02/25/2932021.html